 Shop All
 Artificial Christmas Trees
 Best Sellers

DIY Christmas Decorations: Easy, Affordable, and Creative Ideas
DIY Christmas decorations are fun, personal, and budget-friendly. Research even suggests that crafting boosts mood and wellbeing. You don’t need to be an expert crafter to make your home look festive. Simple materials like paper, yarn, pinecones and recycled odds-and-ends can be transformed into beautiful holiday decor. In the sections below we explore a variety of easy DIY Christmas decorations that anyone can make with basic supplies.
Adorning the Tree: Ornaments Made with Love
The Christmas tree is the shining centerpiece of holiday décor, becoming more meaningful with each passing year. For most people what makes trees special aren’t the ones that look like they came from a catalog, but the ones that tell a family’s story. Every handmade ornament adds to that story. These homemade ornaments turn the tree into more than just decoration; they make it a collection of memories, built with love one ornament at a time.
Yarn-Wrapped Stars & Yarn Ball Ornaments
The soft texture and warmth of yarn make it comfortable to work with and the perfect companion on a cold winter night. With just a little effort, simple projects can turn this humble material into cozy, rustic decorations.
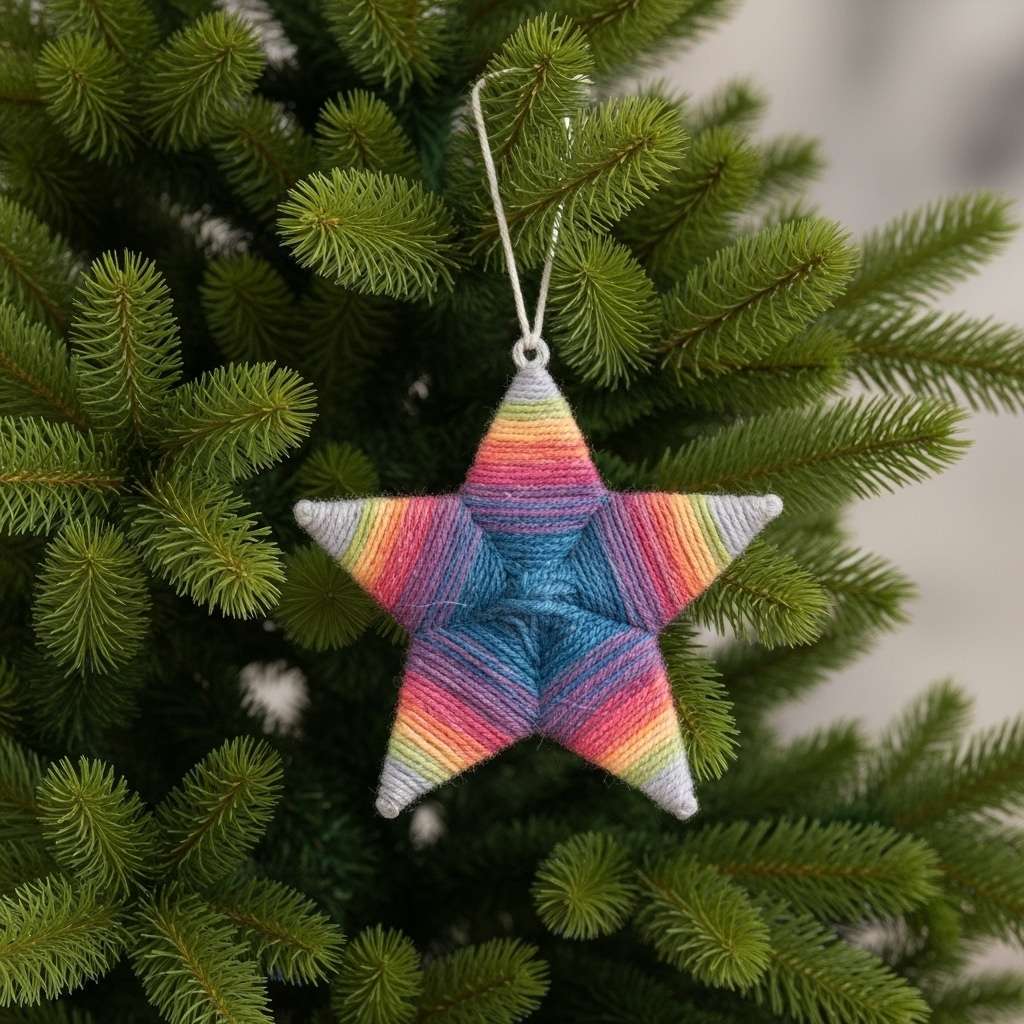
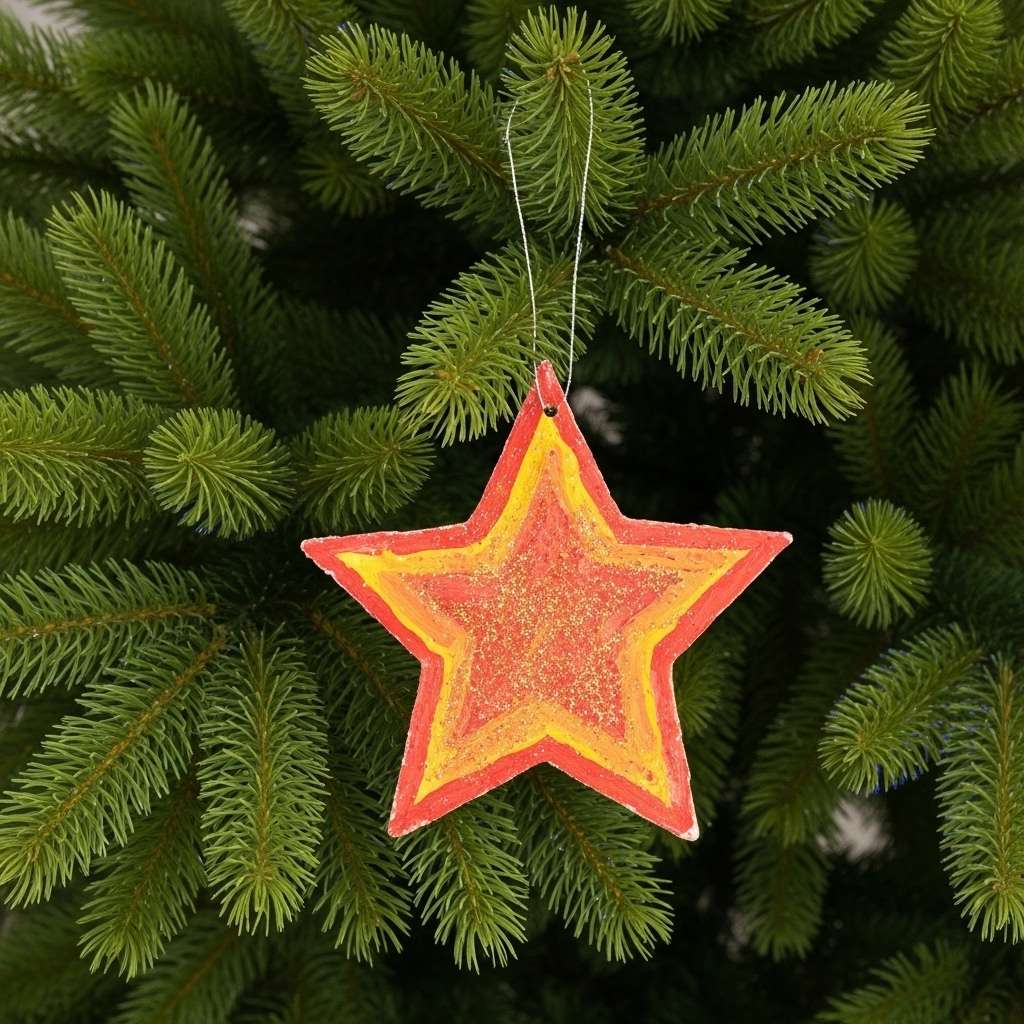
Yarn-Wrapped Stars
Materials:
- Base Form: Sturdy cardboard or foam core cut into star shapes; pipe cleaners and a star-shaped cookie cutter; or plastic star-shaped bracelets.
- Yarn: Various colors and textures. Ombre yarn creates a beautiful, effortless color transition.
- Tools: Scissors, tape, or a hot glue gun.
Instructions:
1. Create Your Star Base:
- For Cardboard/Foam Core: Cut out a simple star shape. Tape the end of your yarn to the back to begin.
- For Pipe Cleaners: Wrap a pipe cleaner around the outside of a star-shaped cookie cutter to get a perfect shape. Twist or tape the ends of the pipe cleaner together to secure it.
- For Plastic Bracelets: Simply use the pre-made star shape as your base.
2. Prepare the Yarn:
- For easier handling, roll your yarn into a small ball. This allows you to pass it through the center of the star without tangling.
3. Wrap the Star:
- Begin wrapping the yarn around the star base, ensuring the strands are taut and lie next to each other. Overlap the yarn to cover the base completely. For cardboard or foam core stars, a small dab of hot glue on the points can help prevent the yarn from slipping off.
4. Secure the End:
- Once the star is fully covered, tie the yarn off in a knot on the back. Secure the knot with a small dot of white glue or hot glue for extra durability. Add a loop of yarn or fishing line for hanging.
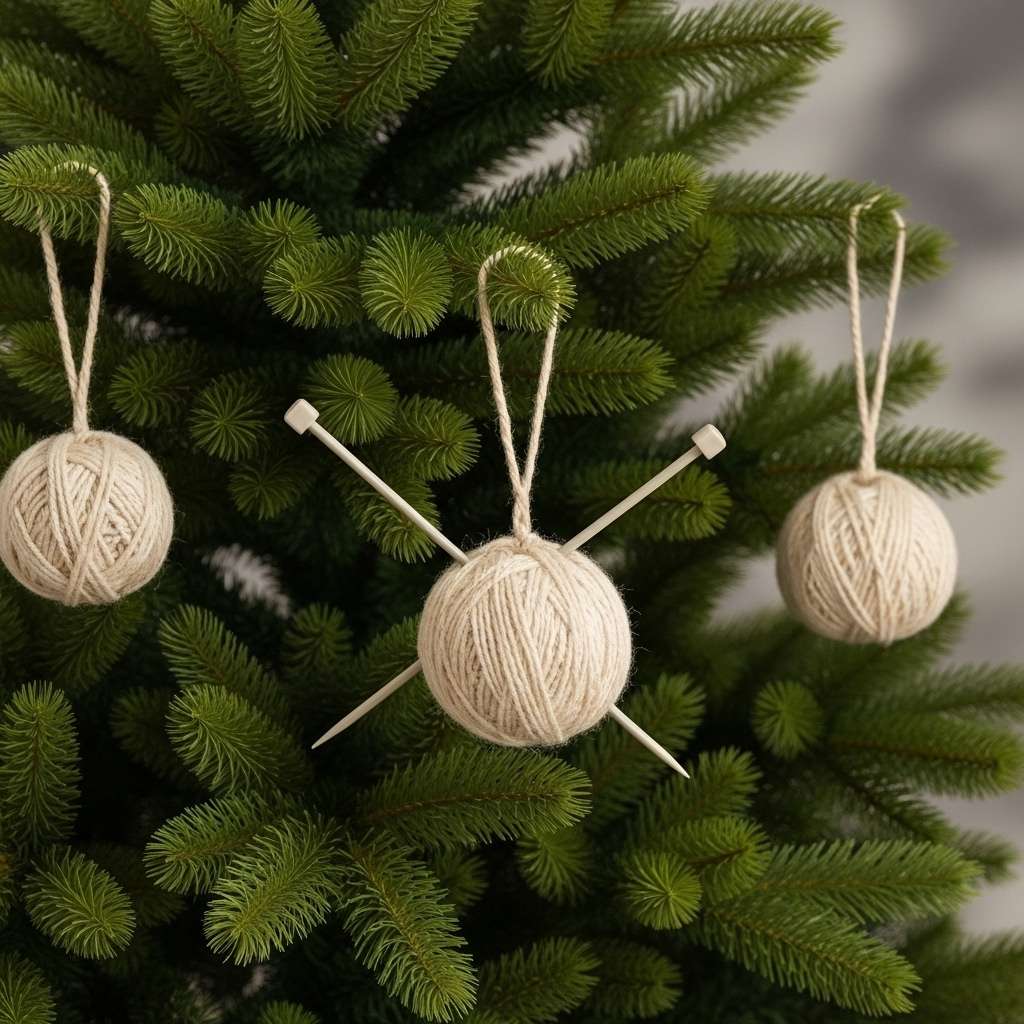
Yarn Ball Ornaments
Materials:
- Method 1 (Hollow Ball): Small round balloons, yarn, liquid glue (Elmer's, Mod Podge, or Aleene's Tacky Glue), water, and a container for mixing.
- Method 2 (Solid Ball): Styrofoam balls or clear plastic ornaments, yarn, and a hot glue gun.
- Optional (for both): Faux knitting needles (bamboo skewers with wooden beads glued to the ends) or real crochet hooks for a knitter-themed ornament.
Instructions (Method 1: Hollow Balloon Method):
1. Prepare Glue Mixture:
- In a disposable container, mix your chosen glue with a small amount of water to thin it slightly. Aleene's Tacky Glue is particularly effective when thinned.
2. Inflate Balloon:
- Blow up a small balloon to your desired ornament size, just to the point where it becomes round.
3. Coat the Yarn:
- Submerge a long strand of yarn in the glue mixture until it is completely saturated. As you pull the yarn out, run it between your fingers to remove excess glue, leaving it coated but not dripping.
4. Wrap the Balloon:
- Begin wrapping the glue-soaked yarn around the balloon in a random, crisscrossing pattern until you are happy with the coverage. A crucial tip for a clean finish is to not pat or smooth the yarn down against the balloon; this can cause a thin film of glue to dry between the strands.
5. Dry Completely:
- Hang the wrapped balloon to dry for at least 24 hours. Place wax paper underneath to catch any drips. The yarn should be completely hard when dry.
6. Reveal the Ornament:
- Once dry, pop the balloon and carefully pull it out through one of the gaps in the yarn structure. Attach a hanging loop.
Instructions (Method 2: Solid Ball Method):
1. Start Wrapping:
- Apply a dot of hot glue to a styrofoam or plastic ornament ball and press the end of your yarn into it.
2. Cover the Ball:
- Begin wrapping the yarn around the ball, adding small dots of hot glue sporadically to keep the yarn in place. A helpful tip for plastic ornaments is to lightly sand the surface first to give the glue better grip.
3. Create a Pattern:
- Wrap the yarn in a neat spiral for a uniform look, or in a haphazard, crisscrossing pattern for a more rustic, "ball of yarn" appearance. Continue until the entire surface is covered.
4. Add Embellishments:
- If creating a knitter-themed ornament, carefully push two faux knitting needles (skewers with beads) through the yarn so they cross in the front. Add a hanging loop to finish.
Painted Pinecones & Rustic Twig Ornaments
These projects celebrate natural materials, transforming pinecones and fallen twigs into pieces of rustic Christmas decor that speak of snowy walks and woodland stillness.
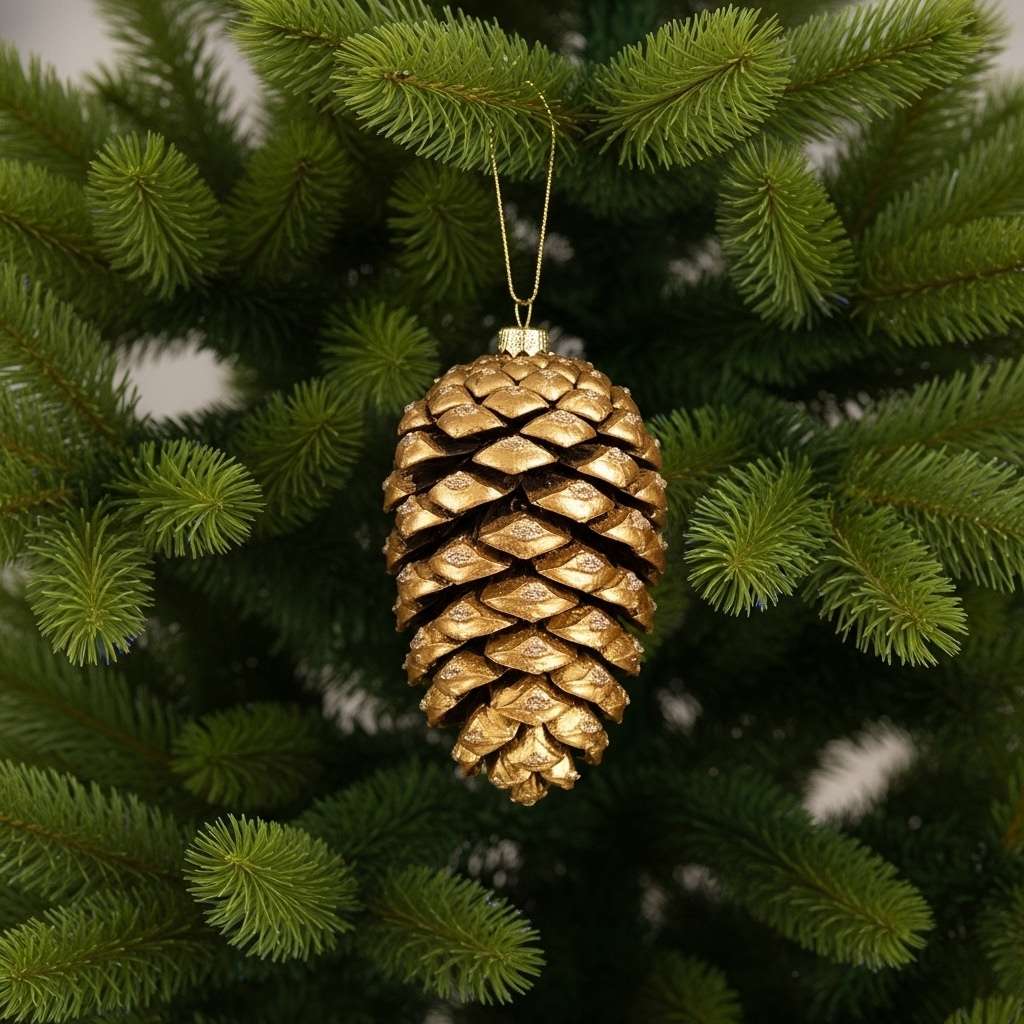
Painted Pinecones
Materials:
- Pinecones: Foraged from your yard or purchased from a craft store.
- Paint: Metallic spray paint (gold, silver, and copper are especially lovely) or acrylic craft paint and a small brush.
- Optional: Clear acrylic sealer for protection, glitter, small peat pots and craft wire for a potted ornament look.
Instructions:
1. Prepare Foraged Pinecones:
- This is a critical first step. If you've collected pinecones from outside, they may harbor insects or be closed up with moisture. Clean them with a solution of vinegar and water, then bake them on a foil-lined sheet in a 200°F oven for 30-60 minutes. This will kill any bugs, dry them out (causing them to open up beautifully), and harden any sticky sap.
2. Paint Your Pinecones:
- Spray Paint Method: In a well-ventilated area (preferably outdoors), lay pinecones in a cardboard box. Apply several light coats of spray paint, letting them dry between coats. Turn the pinecones frequently to spray them from all angles—top, bottom, and sides—to ensure the paint gets into all the nooks and crannies for full, even coverage.
- Craft Paint Method: For a "snow-dusted" look, simply dip the tips of the pinecone scales in white acrylic paint. You can also add glitter while the paint is wet for extra sparkle.
3. Create an Ornament (Optional):
- To create a charming potted pinecone ornament, first wrap craft wire around the base of the pinecone, twisting it into a hanging loop. Then, spray paint both the pinecone and the wire. Fill a small peat pot with a piece of floral foam, add a dollop of hot glue, and press the painted pinecone into place.
4. Seal for Longevity (Optional):
- Once the paint is fully cured (which can take several days), you can apply a coat of clear acrylic sealer to protect the finish and help preserve the pinecone for years to come.
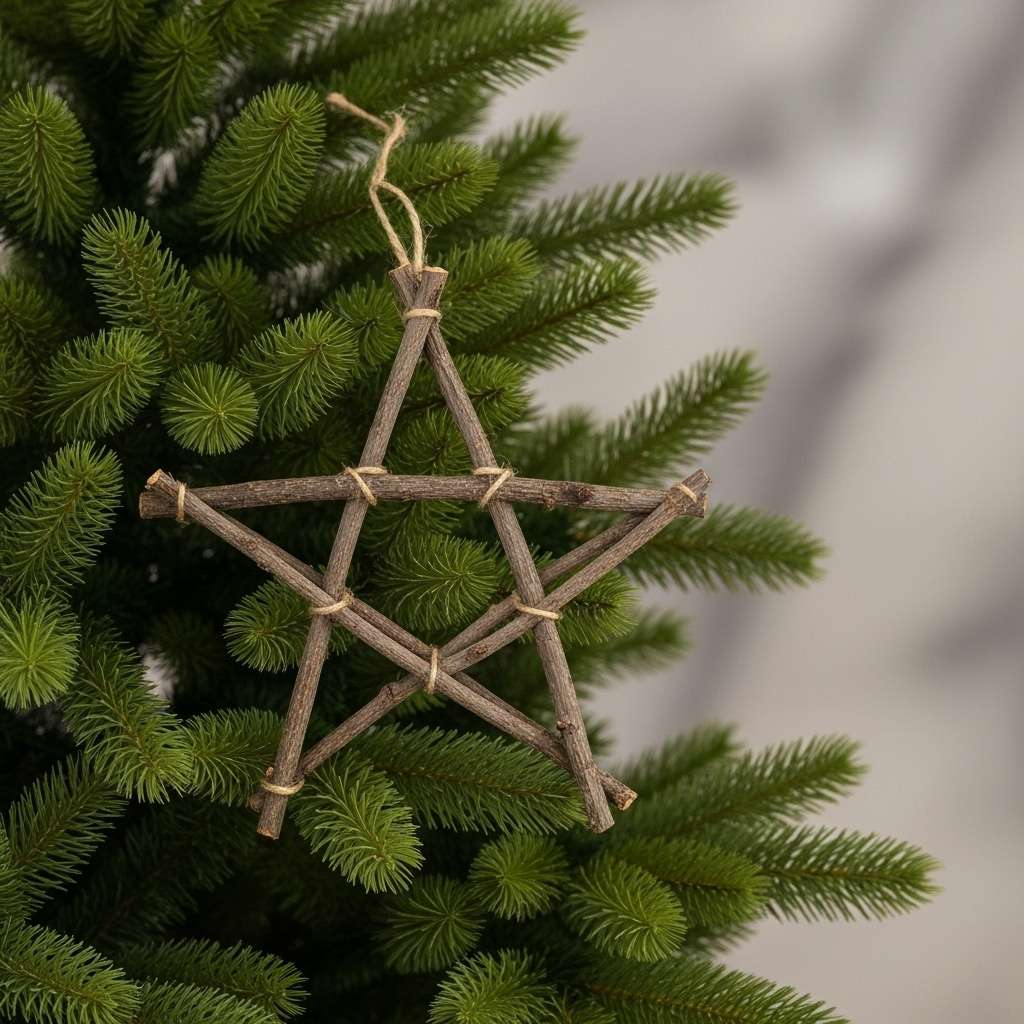
Rustic Twig Ornaments
Materials:
- Twigs: Thin, dry, and dead branches are easiest to snap or cut.
- Tools: Garden clippers, a small hand saw, and a hot glue gun.
- Embellishments: Twine, colorful yarn, pipe cleaners, fabric strips, small pom-poms, or star sequins.
Instructions:
1. Design Your Shape:
- Decide on simple, recognizable shapes like a star, a Christmas tree (a large triangle for the body with smaller horizontal pieces), or a reindeer (a triangle for the head).
2. Cut the Twigs:
- An adult should handle this step. Use clippers or a saw to cut the twigs to the required lengths for your chosen shape.
3. Assemble with Glue:
- Use a hot glue gun to carefully assemble the twigs end-to-end to form the structure of your ornament. Hold the pieces firmly until the glue has cured and the structure is solid.
4. Add Color and Texture:
- This step is wonderful for little hands. Tie one end of a piece of yarn or twine to the twig frame. Demonstrate how to wrap and layer the string over the branches. You can secure the ends with a knot or a small dot of hot glue. Encourage mixing colors and textures for a vibrant, personalized look.
5. Finishing Touches:
- Add a final embellishment, like a sequin star at the top of a tree or a red pom-pom for a reindeer's nose. Tie a loop of twine to the top for hanging.
Repurposed Cardboard Cutouts & Book Page Birds
This approach is not only gentle on the planet but also imbues your decor with a unique story, giving old materials a cherished new life and turning potential trash into treasured keepsakes.
Repurposed Cardboard Cutouts
Materials:
- Cardboard: Any kind will do! Sturdy shipping boxes are great for durability, while thinner cereal boxes are easier to cut.
- Cutting Tools: A precision craft knife for clean lines or sharp scissors.
- Decorations: Acrylic paints, glue, biodegradable glitter, and string for hanging.
- Optional: Mod Podge or a clear sealant to preserve the ornaments.
Instructions:
1. Cut Your Shapes:
- Draw simple festive shapes—stars, snowflakes, trees, bells—onto your cardboard. Carefully cut them out. For a polished look, take your time to make the cuts clean and precise.
2. Create 3D Ornaments:
- For a more dynamic look, cut two identical shapes (e.g., two stars). Cut a slit halfway up from the bottom of one star and halfway down from the top of the other. Slide the two pieces together at the slits to create a three-dimensional ornament that can be viewed from all angles.
3. Paint and Embellish:
- This is where the magic happens. Paint your cardboard shapes with vibrant acrylics. Once dry, apply a thin layer of glue and sprinkle with glitter for a festive sparkle. You can also add details with paint pens or glue on sequins.
4. Seal for Durability:
- To ensure your cardboard ornaments last for many seasons, apply a coat of Mod Podge or a clear acrylic sealer. This will protect them from moisture and wear. When storing, wrap them individually in tissue paper and keep them in a cool, dry place.
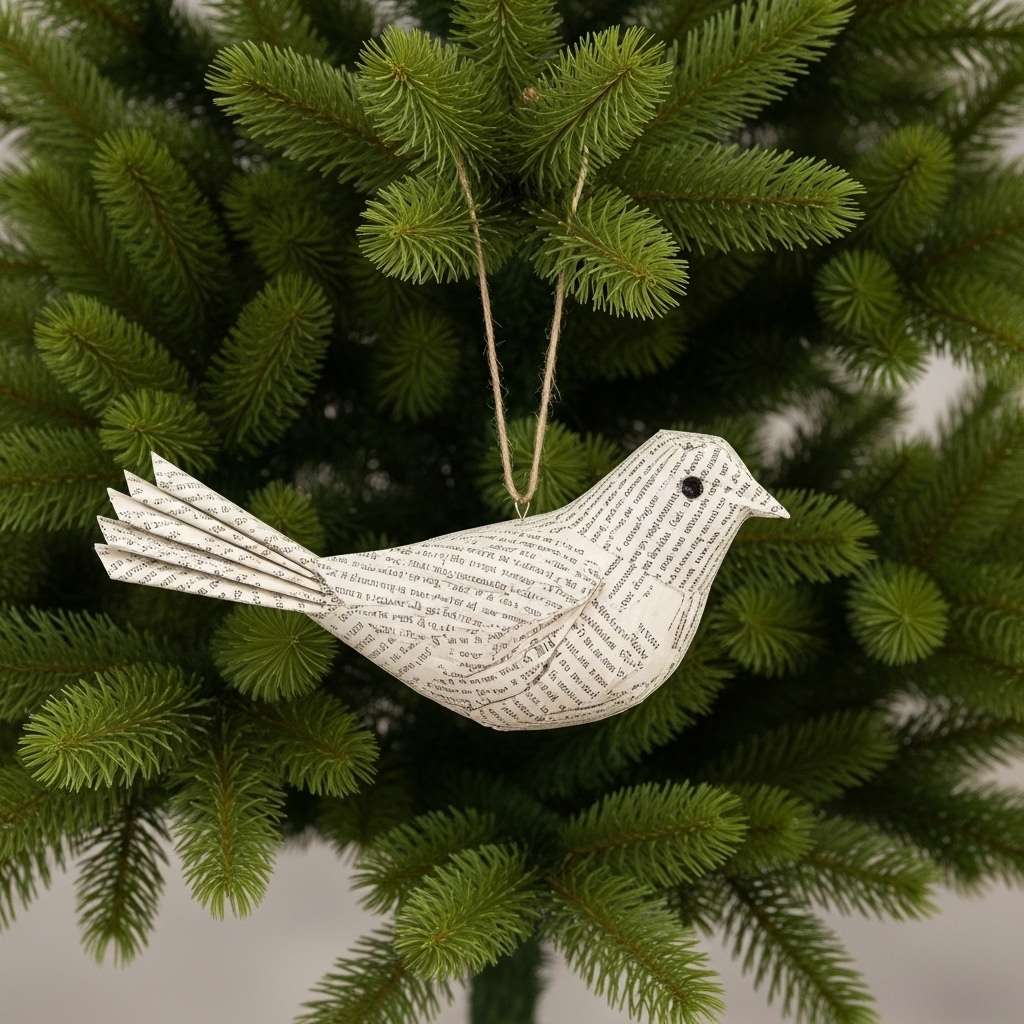
Book Page Birds
Materials:
- Book Pages: Use pages from an old, damaged book that is no longer readable. This gives the paper a beautiful new purpose.
- Templates: A simple bird and wing template (easily found online or drawn freehand).
- Tools: Scissors, a pencil, and glue.
- Hanger: Twine or thin ribbon.
- Optional: An ink pad for distressing the edges or fine glitter for a touch of shimmer.
Instructions:
1. Cut the Shapes:
- Stack three book pages together. Trace the bird and wing templates onto the top page, then cut through all three layers at once. This will give you three identical bird bodies and three wing sets.
2. Add Embellishments (Optional):
- Before assembling, you can add character to the paper. Gently rub an ink pad along the cut edges to give them a vintage, distressed look. Alternatively, apply a glue stick to parts of the wings or body and sprinkle with fine glitter.
3. Assemble the Bird:
- Stack the three bird cutouts, adding a tiny dab of glue between the layers to hold them together. Do the same for the wing cutouts. This layering adds sturdiness and a subtle dimension.
4. Shape the Wings and Tail:
- Gently roll the tips of the assembled wings and the end of the tail around a pencil. This will give them a soft, realistic curl and make the bird appear more three-dimensional.
5. Attach the Wings and Hanger:
- Glue the assembled wings onto the sides of the bird's body. Cut a length of twine for the hanger, form a loop, and glue it securely to the bird's back. For a clean finish, you can press a small scrap of book page over the glued ends of the twine.
Crochet Baubles, Painted Wood Slices, & Beaded Snowflakes
For those who find joy in the meticulous and meditative process of traditional crafting, this section is a celebration of detail and skill.
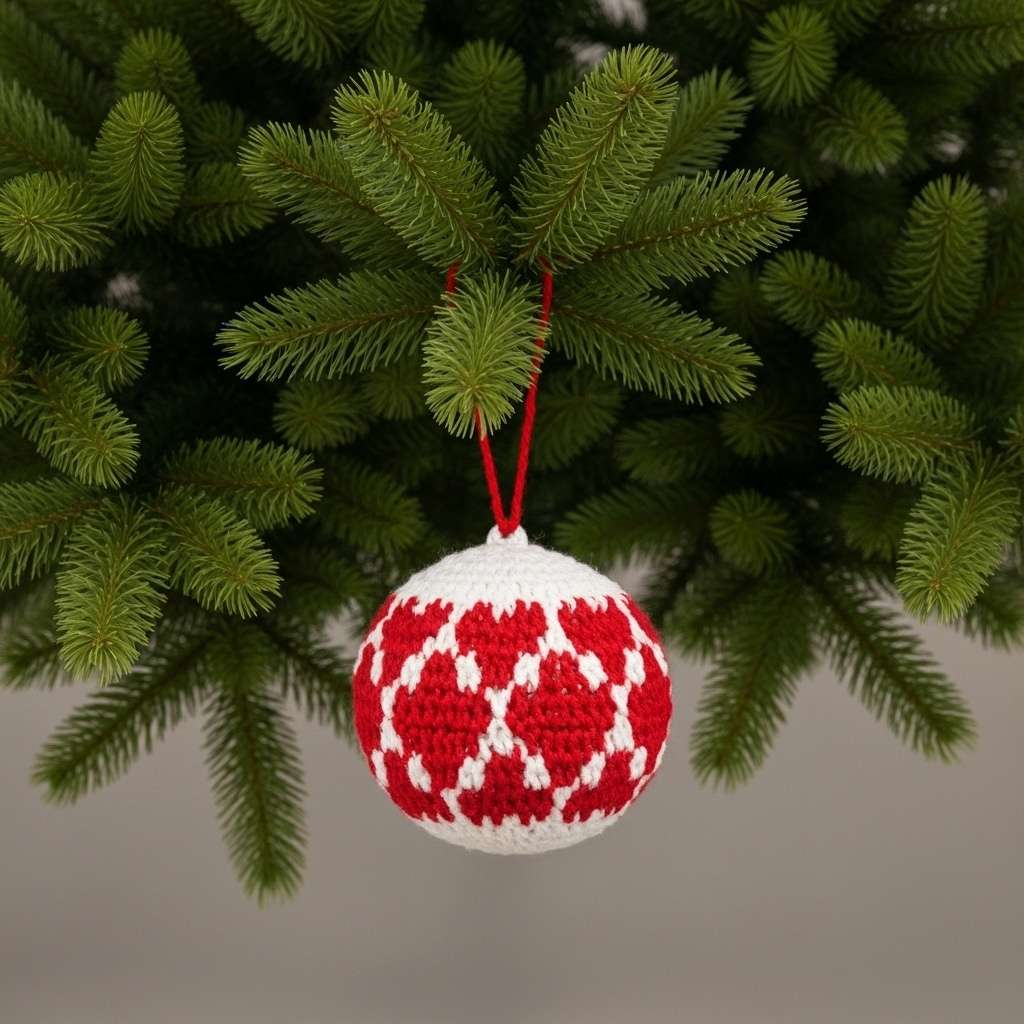
Crochet Baubles
Materials:
- Yarn: Fingering or sport weight cotton yarn in festive colors.
- Hook: A 2.75mm crochet hook (or size appropriate for your yarn).
- Filling: Polyester fiberfill for a soft ornament, or plain plastic/glass baubles to use as a base for a cover.
- Tools: A yarn needle for weaving in ends.
Instructions:
1. Begin the Sphere:
- Start with a magic ring.
- Rnd 1: Work 6 single crochet (sc) into the ring (6 sts).
- Rnd 2: Work 2 sc in each stitch around (12 sts).
- Rnd 3: *1 sc in next st, 2 sc in next st* repeat around (18 sts).
- Continue increasing in this manner (adding one more sc between increases each round) until the bauble reaches your desired diameter.
2. Work the Body:
- Once you have reached the widest point, work several rounds of 1 sc in each stitch with no increases. This will form the straight sides of the sphere.
3. Begin Decreasing:
- Now, reverse the process to close the sphere.
- Work rounds of single crochet decreases (sc2tog) evenly spaced, mirroring your increase rounds. For example, if your last increase round was *4 sc, 2 sc in next st*, your first decrease round will be *4 sc, sc2tog*.
4. Stuff and Finish:
- When the opening is small, pause to stuff the bauble firmly with fiberfill. Continue decreasing until only a small hole remains. Cut the yarn, leaving a tail, and use a yarn needle to weave the tail through the final stitches and pull tight to close. Weave in the end securely. For more detailed patterns with color changes and embellishments, you can explore specialized crochet blogs like Thoresby Cottage.
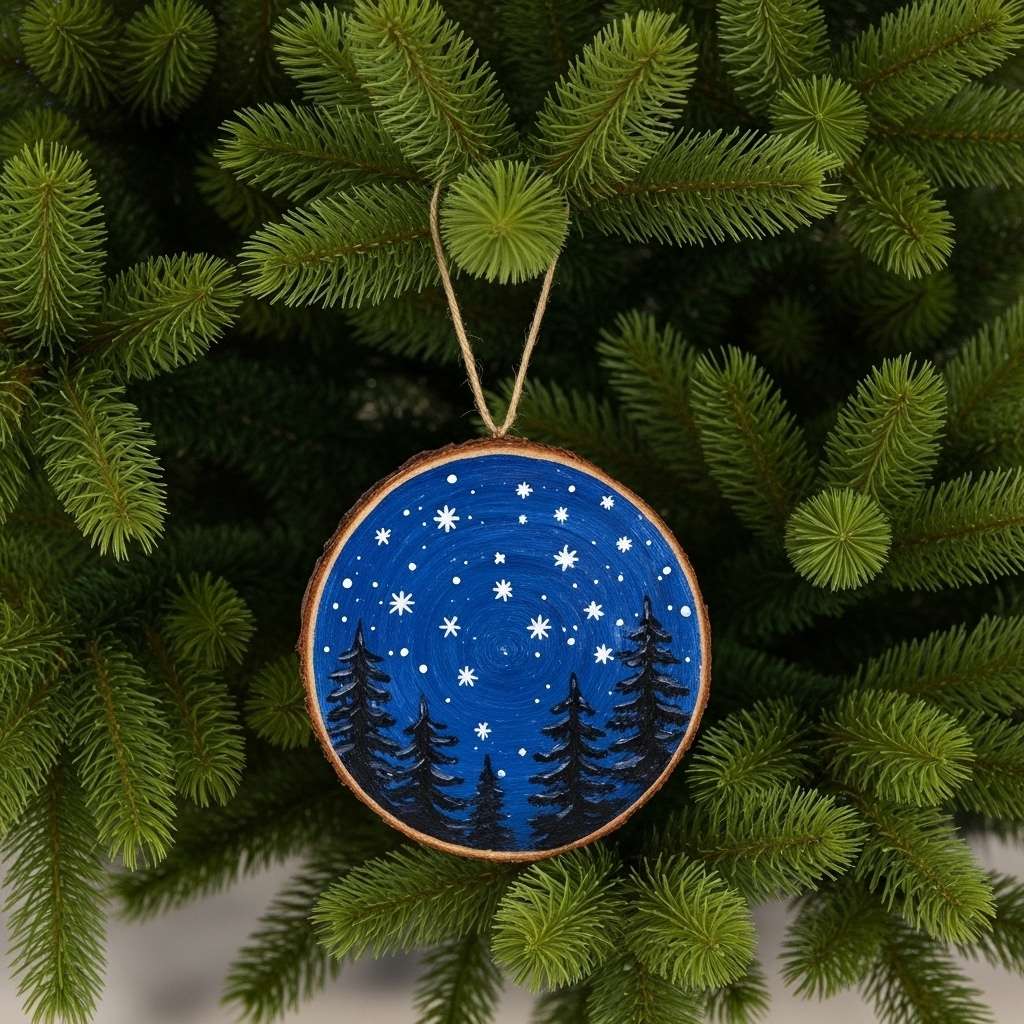
Painted Wood Slices
Materials:
- Wood Slices: Pre-drilled wood slices, about 3.5-4 inches in diameter, are ideal.
- Paint: Acrylic paints are best as they adhere well to wood. For fine details, acrylic paint markers (like Posca pens) are excellent.
- Brushes: A small flat brush for backgrounds and a fine-detail brush for small elements.
- Sealer: A clear varnish or sealer, such as Liquitex gloss varnish or Mod Podge, to protect the finished piece.
Instructions:
1. Prepare the Surface (Optional but Recommended):
- For the most professional and lasting finish, lightly sand the surface of the wood slice with fine-grit sandpaper. Wipe away any dust, then apply a coat of acrylic polymer medium to seal the porous wood. Let it dry completely.
2. Paint the Background:
- Apply a base coat of your desired background color. For a simple and stunning night sky effect, blend colors directly on the wood slice. Start with a dark blue at the top, blend into a green or purple below it, and finish with a light yellow or white at the bottom to create a horizon glow.
3. Add the Details:
- Once the background is dry to the touch, use a fine-detail brush or a black paint marker to add silhouettes of pine trees or mountains along the bottom horizon. Use a white paint pen or a tiny brush with thinned white paint to dot in stars and a crescent moon.
4. Seal the Ornament:
- This is a crucial step. Wait at least 24 hours for the acrylic paint to fully cure. Applying a sealer too soon can cause the paint to reactivate and smudge. Once cured, apply a thin, even coat of your chosen varnish. This will protect the painting and make the colors appear more vibrant. Let the sealer dry completely before hanging.
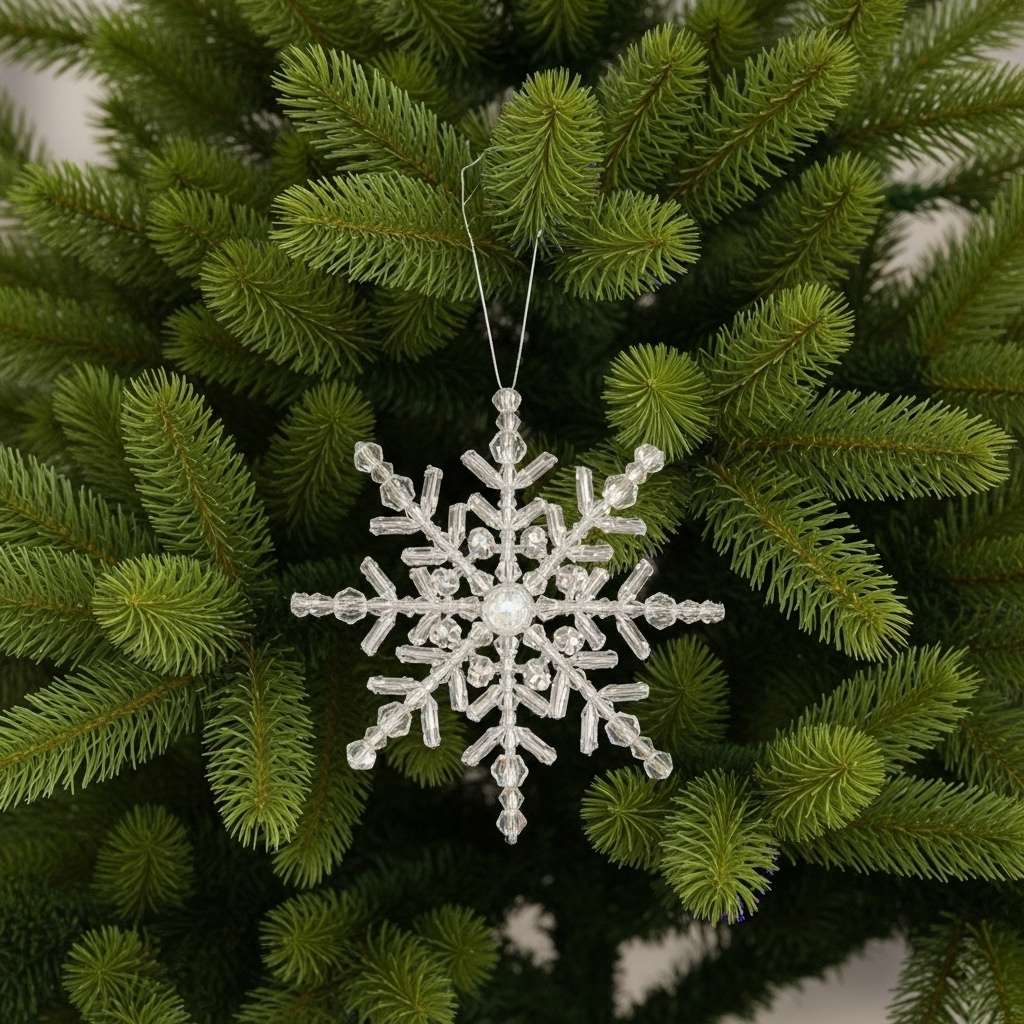
Beaded Snowflakes
Materials:
- Frame: Silver or white pipe cleaners, or pre-made wire snowflake frames for a sturdier ornament.
- Beads: A variety of beads, such as colorful pony beads for a kid-friendly craft, or crystal and glass beads for a more elegant, light-catching design.
- Tools: Scissors for pipe cleaners; round-nose pliers for wire frames.
Instructions:
1. Create the Snowflake Frame (Pipe Cleaner Method):
- Cut three standard pipe cleaners in half, giving you six smaller pieces. Take three of these pieces and twist them together tightly at their centers to form a six-pointed starburst shape. This is your snowflake base.
2. Thread the Beads:
- Begin sliding beads onto each of the six "arms" of the snowflake. This is a wonderful activity for children to practice patterns and fine motor skills. You can create color patterns or simply add beads randomly. Leave about half an inch of pipe cleaner empty at the end of each arm.
3. Secure the Ends:
- To keep the beads from sliding off, simply fold the half-inch tip of the pipe cleaner back over the last bead and tuck it into the bead's hole. This creates a secure finish.
4. Add a Hanger:
- Tie a loop of ribbon or clear fishing line to one of the snowflake's arms for hanging.
Inspired Ideas for Plain Glass Ornaments
Clear glass or plastic ornaments are like blank pages in a storybook. They are the perfect starting point for creativity, allowing you to capture a specific theme, color palette, or memory inside a sphere.

Glitter-Filled Ornaments
For the most vibrant and long-lasting sparkle, the secret is not glue, but a clear, water-based polyurethane like Polycrylic.
Instructions:
- Remove the ornament cap. Carefully pour a small amount of Polycrylic into the ornament. Gently swirl the liquid around to coat the entire interior surface in a thin, even layer. Turn the ornament upside down over a paper cup and let the excess drip out completely. Use a paper funnel to pour in fine glitter, cover the opening with a paper towel, and shake vigorously until the inside is fully coated. Let it dry, replace the cap, and add a ribbon.
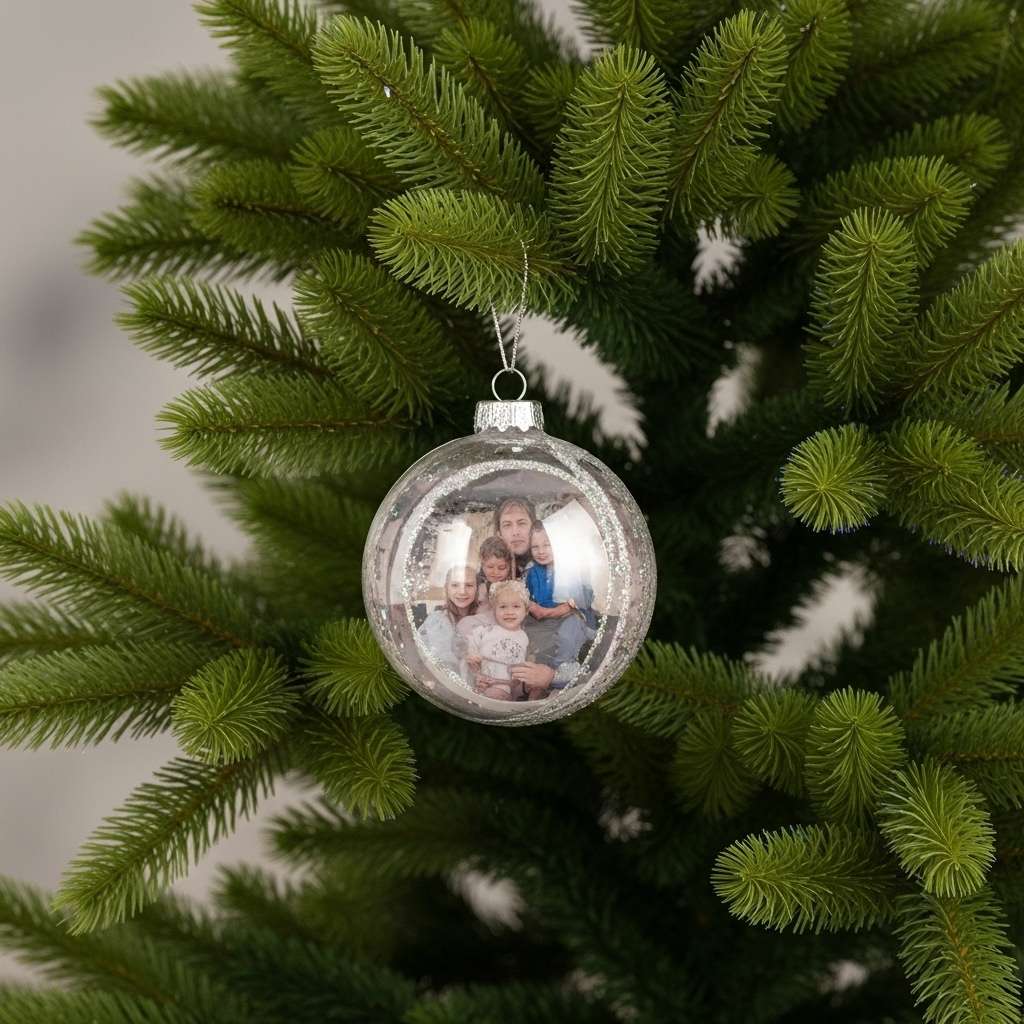
Photo Ornaments
These are incredibly sentimental and make for a deeply personal gift. For best results, use ornaments that are flat on the front and back, like a disc, rather than perfectly round.
Instructions:
- Print a photo, sizing it to fit inside the ornament. Cut the photo into a circle, and cut a matching circle from cardstock for the back. Sandwich a looped piece of clear fishing line between the photo and the cardstock using acid-free double-sided tape. Gently roll the photo into a tube with the image facing outward. Carefully slide the rolled photo into the ornament. Use a soft-tipped stick, like a paintbrush handle, to gently unroll and flatten the photo inside. Thread the ends of the fishing line through the holes in the ornament cap before replacing it to secure the photo in place.
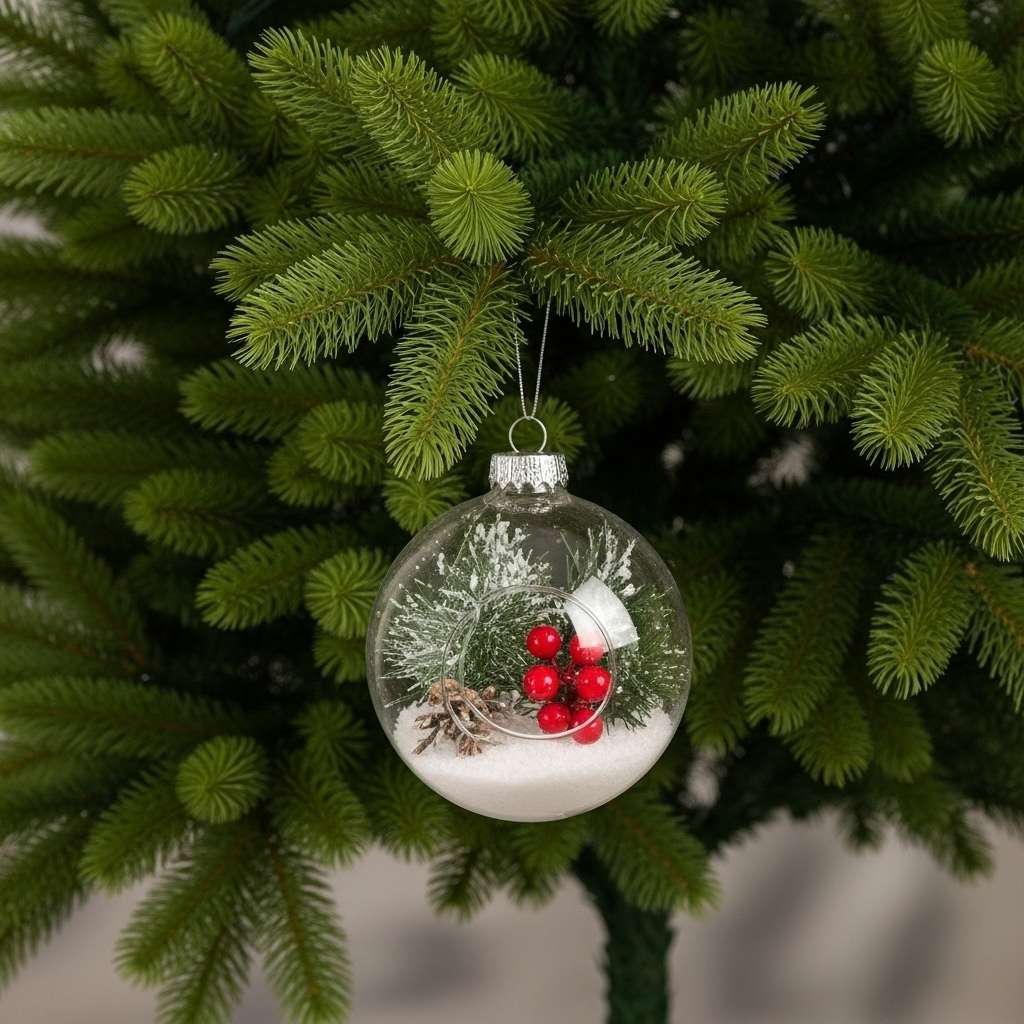
Filled Ornaments
This is perhaps the simplest and most versatile method, allowing you to create a tiny diorama inside each ornament.
Instructions:
- Remove the cap and use tweezers to place small items inside. The possibilities are endless:
- Woodland Charm: Fill with tiny twigs, dried berries, and a sprinkle of faux snow.
- Cozy Textures: Fill with colorful mini felt balls and tiny felt snowflakes.
- Giftable Treat: Fill with a dry hot cocoa mix and mini marshmallows for a charming and edible gift tag.
DIY Door, Window & Hallway Decorations
Once the tree is decorated, the holiday spirit can flow into the rest of the home. A wreath on the front door gives guests a warm welcome, while garlands over mantels, doorways, and staircases carry cheer from room to room. Handmade touches make these classic traditions feel even more personal and special.

The Upcycled Cookie Cutter Garland
Materials:
- Cookie Cutters: A collection of vintage or new metal cookie cutters in festive shapes.
- Twine: Jute twine or a festive ribbon.
Instructions:
- Plan Your Garland: Lay out your cookie cutters in the order you'd like them to appear.
- Tie Them On: Cut a long piece of twine for your garland. Starting with one end, tie the twine securely to the top of your first cookie cutter.
- Space and Repeat: Leave a few inches of space (about four inches is a good measure) along the twine, and then tie on your next cookie cutter. A helpful tip for shapes that are taller than they are wide, like a gingerbread man, is to tie the twine in two places at the top to ensure they hang straight and don't tilt.
- Finish the Ends: Continue this process until all your cookie cutters are attached. Leave a tail of twine at each end for easy hanging, or tie them into loops.

The Ice Skate Wreath
Materials:
- Ice Skates: A pair of old ice skates, preferably white figure skates for a classic look. Check thrift stores or antique shops for a budget-friendly find.
- Wreath & Greenery: A pre-made evergreen wreath and/or a collection of fresh or faux floral picks (pine, cedar, eucalyptus, berries, pinecones).
- Ribbon: A beautiful, wide ribbon to replace the laces and create a bow.
- Hook: A sturdy over-the-door wreath hanger that can support the weight of the skates.
Instructions:
There are two lovely ways to create this piece:
- Method 1: The Wreath Combination:
- First, fluff your wreath to make it look full. A wonderful touch is to replace the original, often worn, skate laces with a beautiful festive ribbon.
- Tie the skates together by their new ribbon laces, positioning one skate slightly higher than the other for a more dynamic look.
- Hang the wreath on your sturdy door hook. Then, hang the tied skates from the same hook, letting them nestle just below or in the center of the wreath.
- Add a large bow made from the same ribbon to the wreath to tie the whole look together.
- Method 2: The Skate Arrangement:
- In this version, the skates themselves become the vessel. Tightly pack the inside of each skate with fresh or faux greenery, berries, and pinecones, creating a lush floral arrangement that spills out from the top.
- Tie the skates together and hang them directly on the door for a simple, yet incredibly charming, piece of decor.
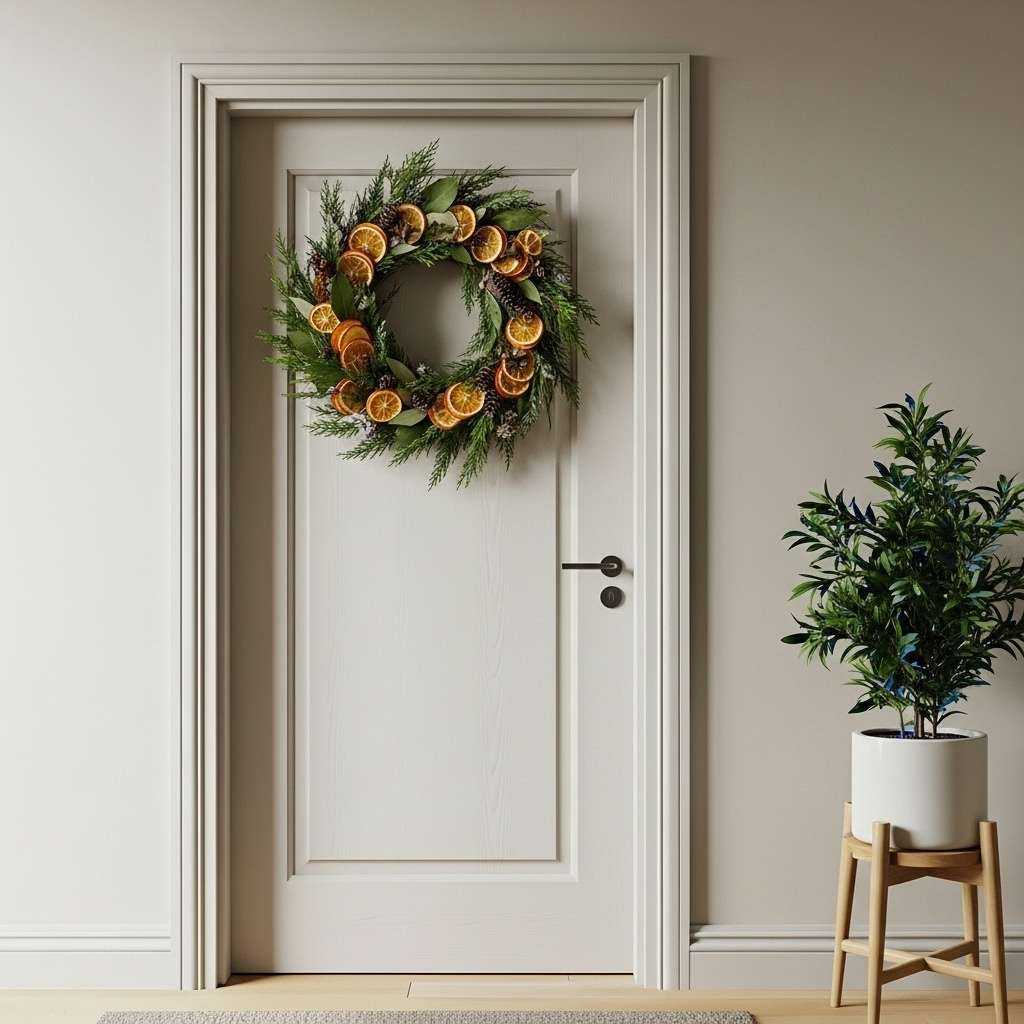
The Dried Citrus Wreath
Materials:
- Wreath Base: A simple grapevine wreath or a minimalist golden hoop wreath.
- Dried Citrus: Thinly sliced and dried oranges, grapefruits, or blood oranges. You can dry them in a 200°F oven for 3-4 hours, flipping occasionally.
- Greenery: Fresh or high-quality faux clippings of cedar, pine, or eucalyptus.
- Tools: Green paddle wire and a hot glue gun.
- Accents: Pinecones, whole dried oranges, or bay leaves.
Instructions:
1. Build the Greenery Base:
- If using a hoop wreath, start by attaching your greenery. Secure the end of the paddle wire to the hoop, then lay a sprig of greenery against it and wrap the wire tightly around the stem to attach it. Continue adding sprigs, overlapping them to hide the wire, until you have the desired amount of greenery.
2. Add Dimension:
- For extra texture, you can wire whole dried oranges or pinecones onto the wreath base before adding the smaller details.
3. Attach the Citrus Slices:
- Once your greenery base is established, use a hot glue gun to attach the dried citrus slices. Layer them over the greenery and each other, filling in gaps and creating a lush, abundant look.
4. Fill in with Accents:
- Tuck in smaller elements like bay leaves or mini pinecones with hot glue to fill any remaining spaces and add the final layer of texture. Hang and enjoy the beautiful sight and scent.
The Festive Table: Centerpieces and More
Creating beautiful Christmas table settings with handmade touches makes moments even more memorable, transforming a simple meal into a festive occasion.
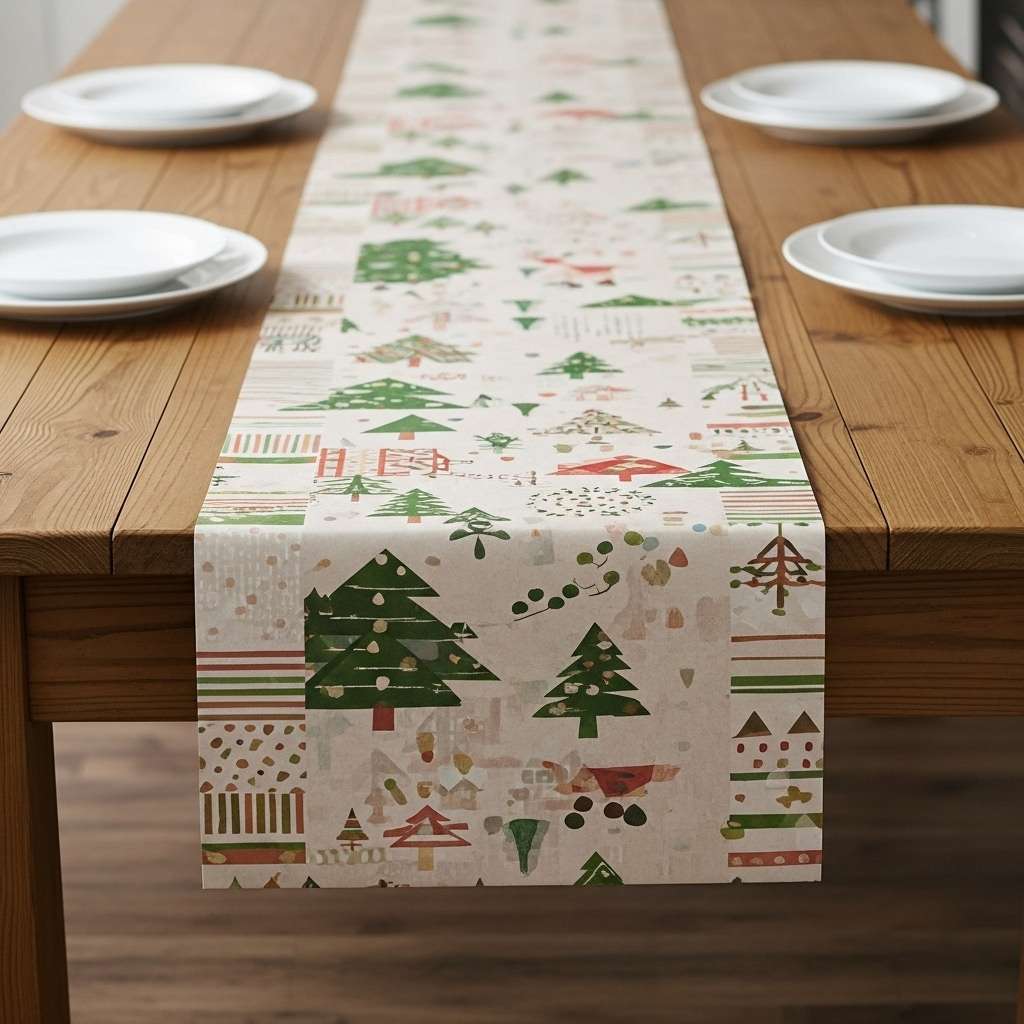
The Paper Table Runner
Materials:
- A roll of high-quality, festive wrapping paper.
- Clear tape.
Instructions:
- Measure and Cut: Roll out the wrapping paper and cut a piece that is the length of your table, or just slightly shorter to allow the ends of the table to show.
- Create a Polished Edge: For a more finished look that prevents curling, flip the paper over to its backside. Fold each of the long edges over by about an inch, creating a crisp crease. Secure the fold with pieces of tape along the length of the runner. This process, much like hemming fabric, gives the paper a cleaner, more substantial appearance.
- Set the Table: Place the runner down the center of your table and arrange your centerpiece and place settings on top. A word of caution: on light-colored wood tables exposed to bright sunlight, some deeply pigmented papers may transfer color over time, so it's best used for specific meals rather than all-season decor.
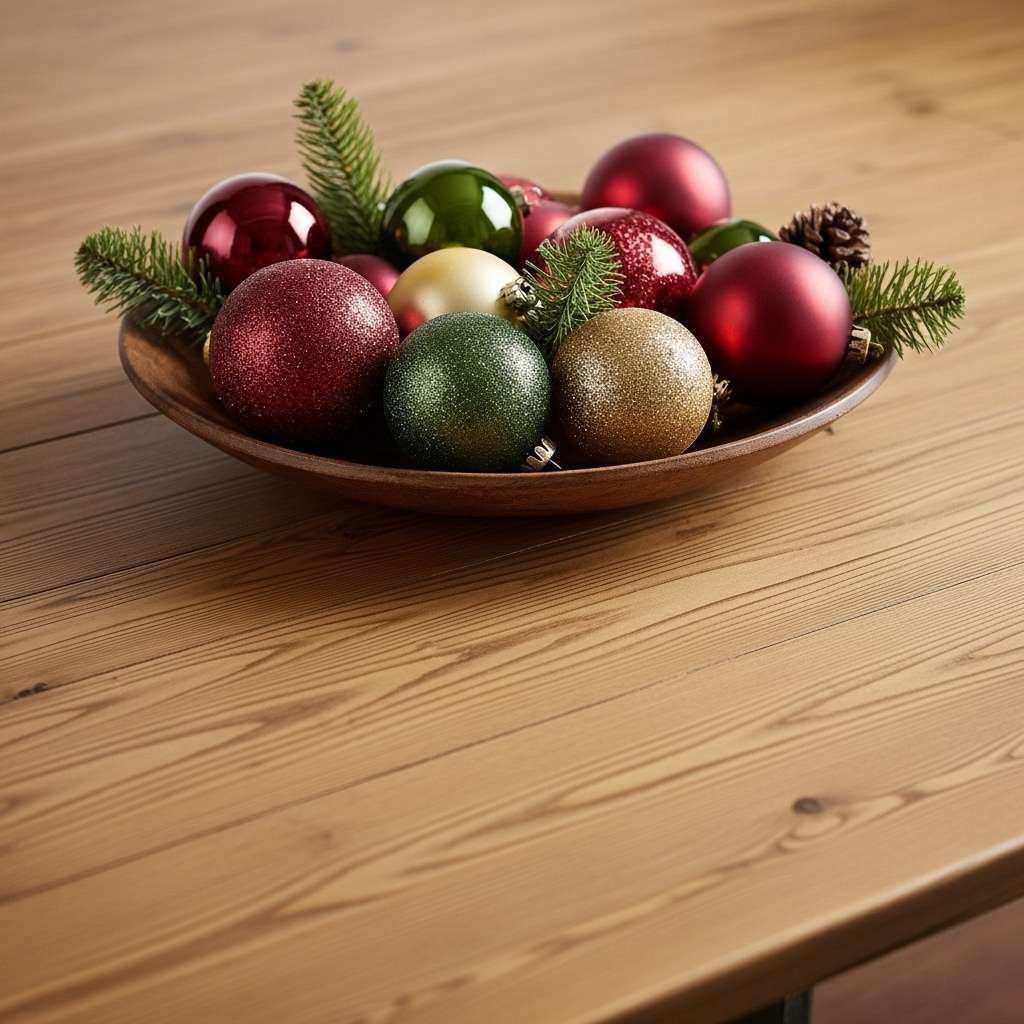
The Ornament Bowl Centerpiece
A single ornament is lovely, but a beautiful group of ball ornaments becomes a show-stopping focal point.
Instructions:
1. Choose Your Vessel:
- Start with a beautiful container. A rustic wooden dough bowl offers organic warmth, a sleek glass bowl provides modern simplicity, and a trifle dish on a tray adds height and grandeur.
2. Layer the Ornaments:
- Begin filling your bowl with ornaments. For the most sophisticated look, use a mix of sizes, colors, and finishes—combine matte, shiny, and glittered balls within a complementary color palette (e.g., shades of silver, gold, and champagne, or deep reds and greens).
3. Add Natural Texture:
- To elevate the arrangement from just a bowl of ornaments to a composed centerpiece, tuck in natural elements. Small sprigs of fresh pine or cedar, interesting pinecones, or even a few pheasant feathers can be nestled into the gaps between the ornaments, adding texture, depth, and a touch of the outdoors.
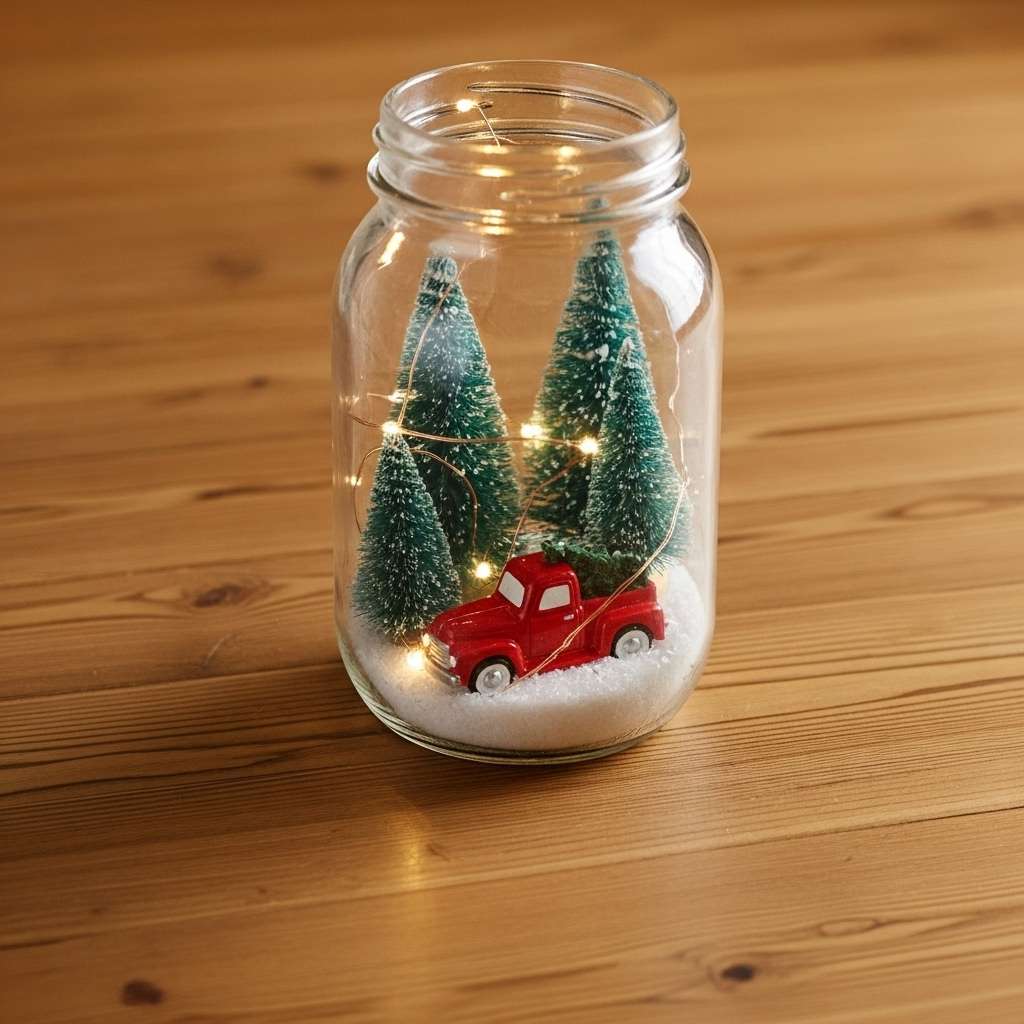
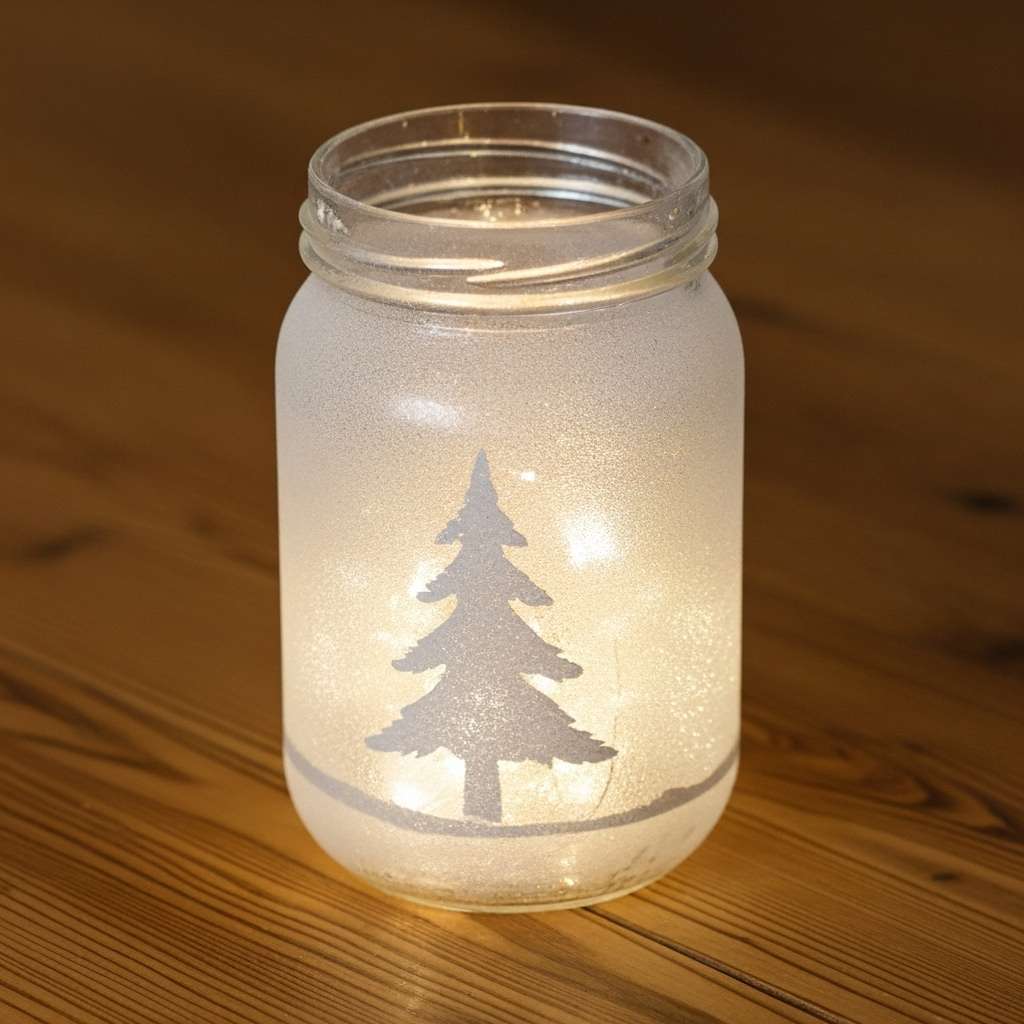
Magical Fairy Light Jars
The beauty of this project lies in its simplicity. Just gather your favorite festive items and stick them in jars with a delicate string of fairy lights.
Instructions:
1. The Winter Wonderland Scene:
- Create a miniature diorama in a jar. Start by pouring a layer of faux snow or Epsom salt into the bottom of a mason jar. Use tweezers to place small bottlebrush trees and miniature figurines, like a tiny deer or a vintage-style red truck, into the "snow." Carefully weave in a strand of battery-powered copper-wire fairy lights, tucking the small battery pack into the snow at the back of the jar.
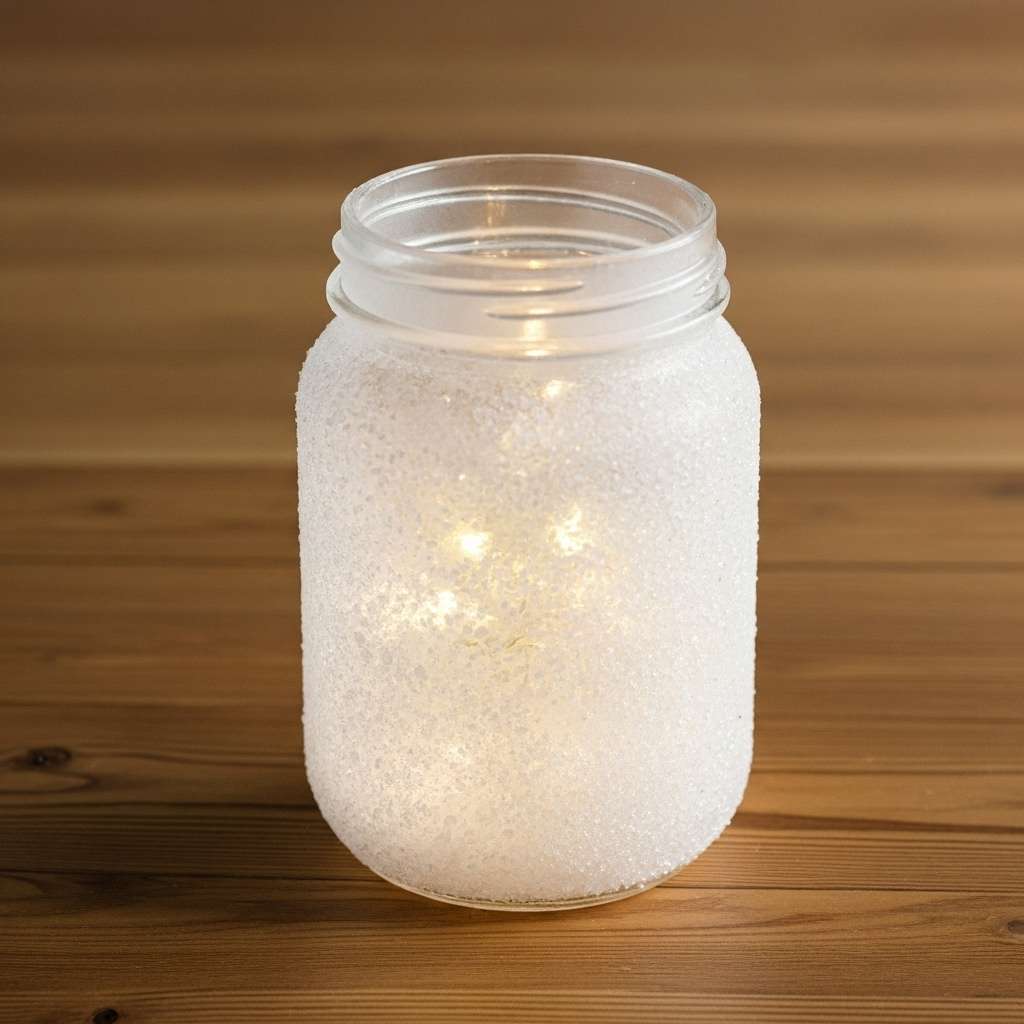
2. The Frosted Glow Lantern:
- For a beautiful, icy effect, coat the outside of a clean jar with a layer of Mod Podge using a foam brush. Before it dries, roll the jar in a shallow dish of Epsom salt until it's fully coated. The salt will adhere to the glue, creating a sparkling, frosted texture. Once dry, place a flameless LED tea light or a coil of fairy lights inside for a soft, diffused glow.
3. The Painted Silhouette Jar:
- Lightly spray the outside of a jar with frosted glass spray paint for a semi-opaque finish. Once dry, use a black or dark-colored paint pen to draw a simple holiday silhouette—like a reindeer, a Christmas tree, or a winter village skyline—onto the frosted surface. When you place lights inside, the silhouette will stand out in beautiful contrast.
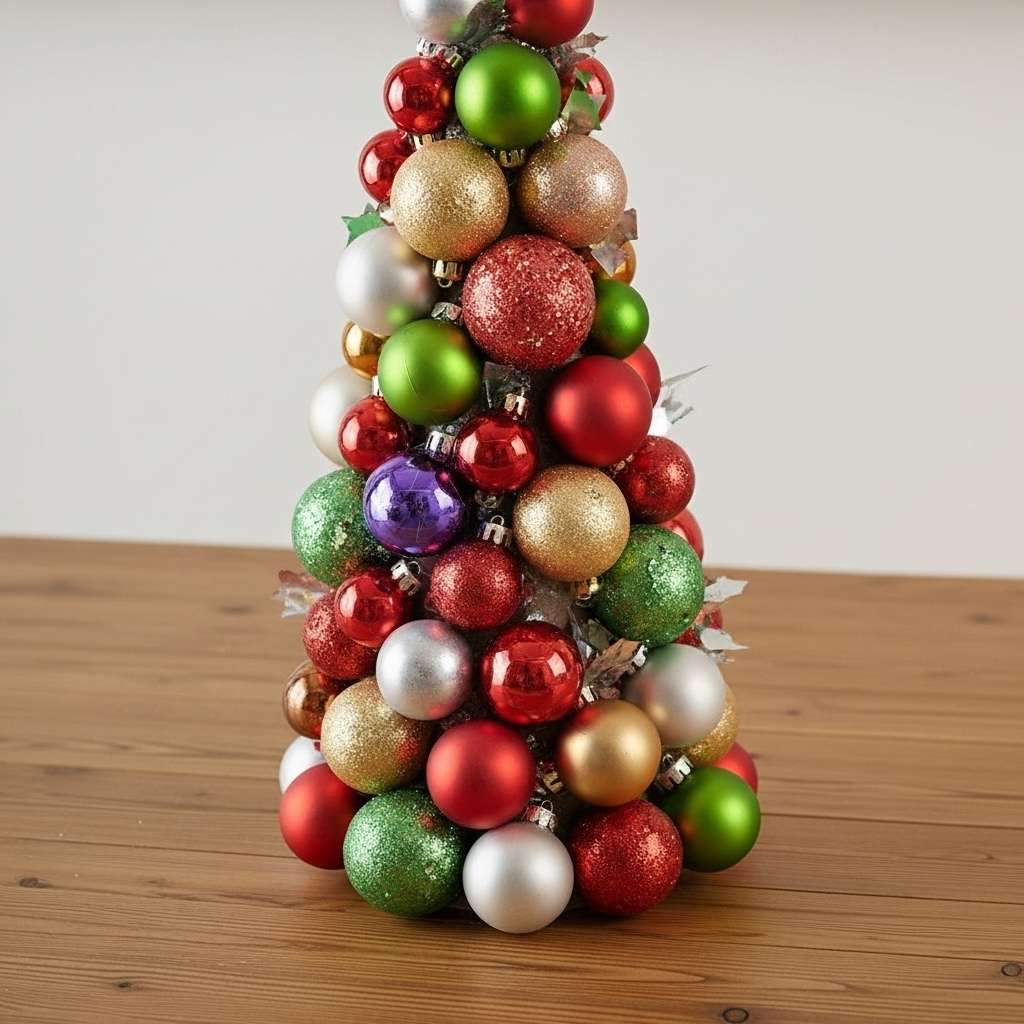
The Styrofoam Cone Ornament Tree
Materials:
- A styrofoam cone in your desired size.
- Small ball ornaments (plastic ornaments are lighter and less fragile than glass for this project).
- A hot glue gun.
- Optional: Tinsel garland in a matching color for filling gaps.
Instructions:
1. Prepare the Ornaments:
- Carefully remove the metal or plastic hangers from the tops of all your ornaments.
2. Start at the Base:
- Apply a ring of hot glue to the bottom edge of the styrofoam cone. Press your first row of ornaments into the glue, holding each one for a moment until it sets. Ensure they are packed tightly together.
3. Work Your Way Up:
- Continue gluing ornaments in concentric circles, working your way up the cone. Stagger the ornaments in each new row to cover the gaps from the row below, much like laying bricks.
4. Fill the Gaps (Optional):
- Once the entire cone is covered, you may notice small triangular gaps where the round ornaments meet. To create a flawless, professional finish, cut small pieces of matching tinsel garland and use a dab of hot glue to tuck them into these gaps. This will hide any visible styrofoam and add an extra layer of sparkle.
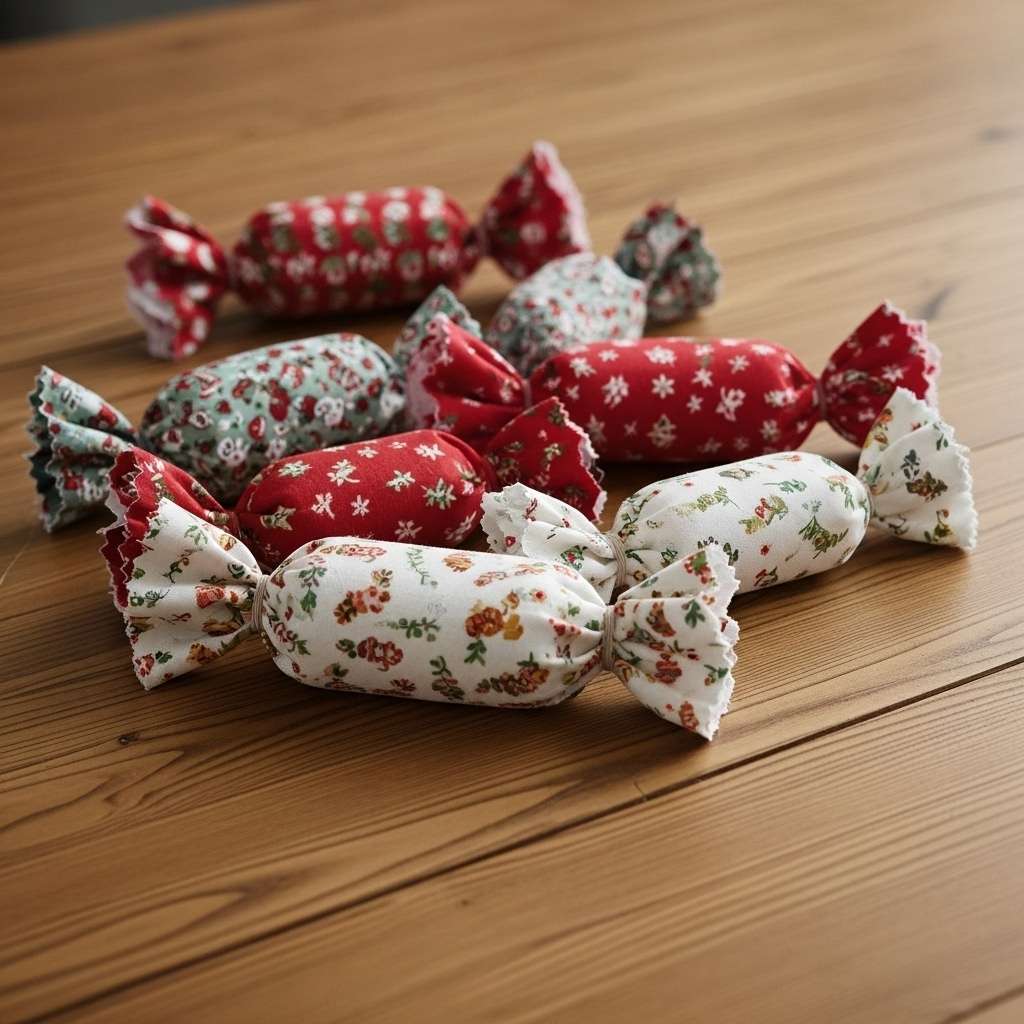
No-Sew Fabric Candies
Materials:
- Fabric scraps in festive colors and patterns (stripes and ginghams work especially well).
- Cotton balls or polyester batting for stuffing.
- Small, clear hair elastics or thin rubber bands.
Instructions:
1. Cut the Fabric:
- Cut your fabric into small rectangles. The size will depend on how large you want your candies to be.
2. Add the Filling:
- Place a few cotton balls or a small wad of batting in the center of the fabric rectangle.
3. Roll it Up:
- Roll the fabric tightly around the filling to form a small log shape.
4. Create the Wrapper:
- Pinch the fabric together about an inch from one end. Tightly wrap a clear elastic or rubber band around the pinched section several times to secure it. This will create the classic twisted look of a candy wrapper. Repeat on the other side.
5. Fluff the Ends:
- Once both ends are secured, fluff out the excess fabric to create a charming, ruffled finish. If you use striped fabric, note how rolling it horizontally versus vertically creates different, fun patterns.

The Therapeutic Power of Crafting
Doing Christmas crafts as an adult isn’t just about decorating. It’s also good for your mind and well-being. In a world full of screens and constant demands, creative hobbies provide a calming break. These activities help your body relax by triggering its natural “rest and digest” response, which lowers stress, slows your heart rate, and eases tension.
And this isn’t just a feeling, research backs it up. Studies on art therapy show that even short bursts of creative activity can reduce cortisol, the hormone linked to stress.
The benefits go even further. Research shows that crafting can boost self-esteem, lift mood, reduce anxiety, and ease depression. One long-term study even found that older adults struggling with depression were over twice as likely to recover if they took up a hobby.
When you choose to make your own holiday decorations, you’re not just preparing your home for Christmas, you’re creating a calmer, more mindful, and more meaningful celebration. Handmade décor reflects your personality, builds family traditions, and creates memories that last year after year. Plus, it’s a more sustainable choice in a world of mass production, helping reduce waste and make the most of what you have.

Weaving Memories, One Craft at a Time
When the last ornament is hung and the final candle lit, the true beauty of DIY Christmas decorations shines through. These projects remind us to slow down, be present, and enjoy the season. Made with family and friends, they become lasting traditions and cherished memories. This year, may your holiday be filled with creativity, connection, and the joy of making it your own.
Discover More From Hearth & Fir
Want to bring the magic of multiple trees into your home? At Hearth & Fir, we have everything you need—from flocked, pre-lit, unlit, and classic white Christmas trees—to help you create a breathtaking holiday display.
Frequently Asked Questions
Get answers to the most common questions about our blogs.
-
For those new to crafting, some of the simplest yet most effective projects include Glitter-Filled Ornaments (just swirl a clear sealant and glitter inside a clear bauble), Painted Pinecones, and the Ornament Bowl Centerpiece. These require minimal technical skill and use basic materials to create a beautiful, festive look with very little effort. The Paper Table Runner, made from wrapping paper, is another incredibly easy idea that makes a big impact.
-
Creating stunning Christmas decor on a budget is all about using clever materials. Focus on projects that repurpose items you have or can find for free. Rustic Twig Ornaments, Repurposed Cardboard Cutouts, and Book Page Birds transform free materials into charming decorations. Similarly, a simple Ornament Bowl Centerpiece using extra baubles or thrifted finds makes an elegant and inexpensive statement piece for your table.
-
Natural elements bring a warm, rustic feel to holiday decor. You can bake and paint foraged pinecones to turn them into beautiful ornaments that will last for years. Collect thin, dry branches to create rustic twig ornaments in shapes like stars and trees. For a fragrant and visually stunning piece, make a Dried Citrus Wreath by adding oven-dried orange slices and pinecones to a simple grapevine wreath base.
-
Crafting with kids is a wonderful holiday tradition. The safest and most engaging projects include making Beaded Snowflakes with pipe cleaners and pony beads, which is great for fine motor skills. Kids can also help paint Repurposed Cardboard Cutouts and decorate Rustic Twig Ornaments by wrapping them with colorful yarn. For a simple activity, let them help arrange an Ornament Bowl Centerpiece or fill jars with faux snow for a magical luminary.
-
Plain glass ornaments are a perfect canvas for creativity. For a mess-free sparkle, coat the inside with a clear polyurethane like Polycrylic and shake in fine glitter to create stunning Glitter-Filled Ornaments. To make a sentimental keepsake, create a Photo Ornament by rolling a small photo and placing it inside. You can also make tiny dioramas by filling them with faux snow, mini bottlebrush trees, or even hot cocoa mix for a unique gift.